Category Archives: Sewing

Stay or go? Part 3: Lazy Sunday

I’m exhausted.

I just spent several weeks rehearsing and finally performing in a stage production with Crystal Bright and the Silver Hands. This show brought together dozens of awesome people that I want to be friends with forever. I saw (and heard) some amazing works of art, and got to cross “Perform on stage” off my list of things to do before I die. This adventure culminated in a three-day show, for which I ended up making my own costume from scratch in less than a week. I played the main character’s sinister toy lamb, one of the characters to comfort her throughout her fairytale-like ordeals. Now that it’s over, I can finally relax and be a lump for a little while. But what  to wear?

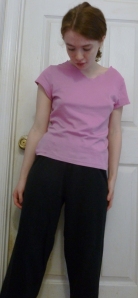
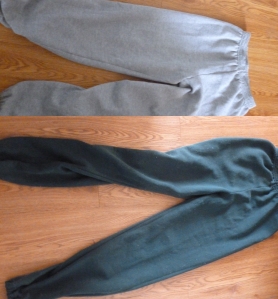
Sweatpants are sad, lifeless garments. You wear them in bed, or working out, or possibly to school. If you’re short like me, you probably have to scrunch them up and leave marks on your ankles, and yet you wear them anyway. Even though they’re generally too hot, people claim they’re comfortable. Look at this:

They’re like deflated stuffed animals. Dead, deformed beasts found in Montauk would look away. They possess about a tenth the majesty of two mating slugs. So I propose that we replace them with yoga pants. They’re more comfortable, easier to hem, and make it look almost like you plan on doing something with your day.

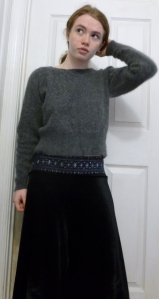
See these? They’re like sweatpants in disguise. The swingy velvet ones are borderline cute.

Yes, you may have to hem them. But with fine knits, a zig-zag or overlock stitch will be all it takes.Most sewing machines include at least one overlock stitch, which requires a special foot. The stitch will usually look like a cross between a zig-zag and a straight stitch. Slash your pants to the desired length, stitch around the edge and bingo, they’re perfect.

Go forth and be lazy.

(Incidentally, the shirts I’m wearing are a teaser for my next post. Stay tuned.)
Leave a comment

Filed under Clothes, Crafting, Sewing

Stay or go? Part 2: Old-n-Busted vs. New Hotness

I like dresses. They’re fancy, quick to put on, and still allow for a nice breeze now and again. Unfortunately, they also get caught on things, stained, stepped on, or ripped. Pretty as they are, the dresses on this list have been heavily worn, and it shows. I’m sure I’ll accumulate many more, but for now I’ve pared it down to a choice few.

Going:

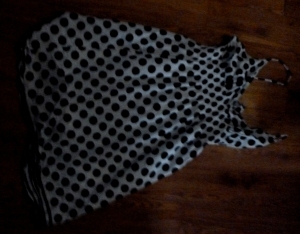
This one I’ve had for so long I broke the straps twice. This could be attributed to the flimsiness of noodle straps, but I like to think it’s due to my TOTALLY HARDCORE LIFESTYLE. Ahem.

This one has belonged to my sister or I for over six years. The knit fabric is thicker and sturdier than most. I thought briefly about keeping it and adding modifications, but the neckline is warped and the material has been bleached a little more than I would like.

This one, believe it or not, is fine. However, my rule for keeping clothes is that I have to be able to style it three ways I would actually wear, and a sheer purple tunic can’t deliver for me.

I am not fond of tunic tops. They possess the inconvenience of dresses, with the added benefit* of requiring pants. Eeevil.

I liked this one while it lasted. Its thin material showed off every jiggle and bump in bizarre ways, but it was thin and pleasant in the hot North Carolina summer. Now it’s threadbare, and feels revealing and childish at the same time. Ew.

I adore the cut on the strapless bodice here. I modeled the bodice on this dress after it. However, the skirt’s too high and cannot be walked in without its sky-high slit. I can appreciate turning heads now and again, but that’s just too much.

This dress has been a nineties nightmare. It’s stiff and shapeless, has a giant, zippered kangaroo pocket, and cannot be taken in without looking worse. Also, why on earth was I so obsessed with military olive?

I got this dress at 7, and was still wearing it at 15. Eek. I wore it so much I drew myself in it when I wanted a self portrait. Now that I’m three years older, I’ve decided I don’t want people thinking I’m an early-blooming elementary schoolkid. Who’d have thought?*

There’s not much to say about this one, really. It didn’t fit anyone in the house, and yet we clung to it in case we suddenly radically changed body type. Not worth it.

This one was alright in cut and color, but the material was strange in a bad way. I also had another I liked better.

Now let’s see the ones I’m keeping.

Staying:

I’m not sure what distracted me.

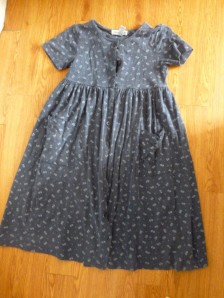
Well-fitting, suitable to wear for most of the year, and it has pintucks and pockets. Win.

Why yes, this is a mumuu. It’s also buttery-soft, lightweight, and blousy but short at the same time. Excellent.

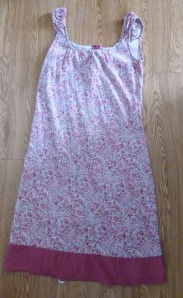
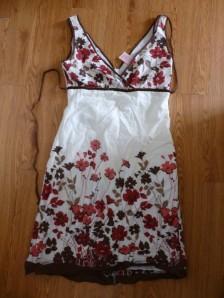
Do I even need to say it? I paid $2 for a close-fitting, 100% cotton, in-your-face eighties piece of magic. I rated the dresses above on a scale of one to this dress. Wonderful.

(*) Denotes sarcasm.

Coming up next: Things to replace those old sweatpants, followed by the big reveal of everything I’ve gotten rid of so far.

1 Comment

Filed under Clothes, Crafting, Sewing

Stay or go? Short-neutral-toned skirt edition.

I have too many clothes. I’m not what I’d call a “shopaholic,” by any stretch of the imagination, but I don’t get rid of enough. Many of my clothes are from a time when I was insecure, and many others just don’t work for me even though they technically fit. My sister is reducing the size of her wardrobe, and I wanted to try a different approach. Behold my many short skirts:

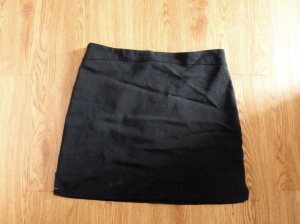
This one is a hand-me-down from sometime in the nineties, like a lot of my clothes. It’s  also unwearable. Note the semi-formal fabric and dress code-violating length.

This one is similarly problematic. I’m not sure I’ve ever worn it. It was originally handed over to my sister, who didn’t like or fit it.

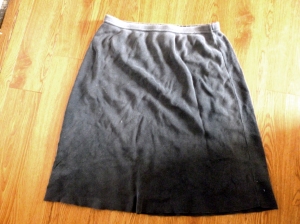
This one, however, is too casual and it looks rather tired. Unlike the others, it was comfortable enough to be worn over and over again until it became a shadow of its former self.

This one is just unpleasant. It’s too short (And the constant creases make it shorter), too bulky and rather bleh.

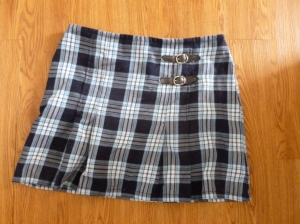
This one is the last survivor from my middle school collection of teensy plaid skirts. It was a bit longer than the others, and so had an excuse to stay. It is, however, definitely the skirt of a 12-year-old girl.

All of these can be replaced easily by pants or the skirt I showed you last time. Fabulous.

1 Comment

Filed under Clothes, Sewing

Things I love (And a diy fishtail skirt)

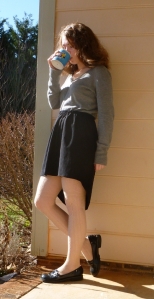
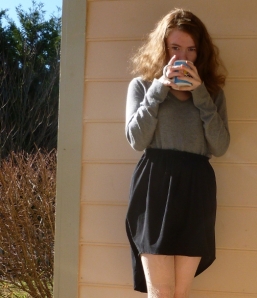
I have been trying to get rid of things I don’t really love. Goodwill will receive a mighty haul from me soon. To replace them,  I’ve been making things I can style a number of different ways. For example, this gathered fishtail skirt inspired by A Pair & A Spare.

Six half-inch tucks in front, four in back.

While I still love plaid, I no longer have reason to wear my collection of short plaid skirts that serve to make me look about 10. Instead I have this, which I would wear every day if I could. It’s a simple gathered skirt, with the elastic sewn directly onto the self fabric instead of into a casing  and cut about six inches longer in back. I love my legs, but I don’t like showing off my unders. This skirt is a nice compromise.

I have a plumbing clamp on my head as a headband. Shiny.

Tights and sweater: Target (On sale), Shoes: unknown, Skirt: DIY, Headband: Home Depot, Mug: New Garden Friends basement sale.

Lesson learned: Making things you really enjoy puts into perspective the things you don’t.

One more.

Also, I’ll get my 1,000th view today! Happy dance.

1 Comment

Filed under Sewing

Men’s button down to ruffly dress (And crochet flower hairclip)

Hi everyone! Hope you’re having a good summer.

My dress, made entirely out of one of my dad's shirts.

I’ve had some free time. Badly-illustrated tutorial to come!

Also, in that picture up there I’m wearing this thing on my head:

This.

The flower is the rose in the middle of the Anticraft‘s Asphyxiation choker, which I then stitched onto a scrap of blue fabric, beaded in the middle and tacked onto a large barrette. I have thick, unruly hair, which easily explodes or covers any smaller, wimpier scalp-jewelry.

See you guys soon!

1 Comment

Filed under Crafting, Crochet, Sewing

Things I made when you weren’t looking

Hello earthlings! I’m back, and I’ll hopefully be updating more regularly. I have stuff to share.

I found all my stuff for this (including notions) at my Quaker meeting’s semiannual basement sale, which is possibly the best place to thrift I have ever encountered. Seriously, pay close attention to your local small places of worship. Everything there is previously owned, meaning you’re reusing instead of buying new wares and contributing to the world’s waste. If you look, you can find some absolute gems for dirt cheap. I’ll ramble more on this in a future post.

First off on the Things I Made list: A pillowcase nightie, from instructions found HERE. I added pockets and crossed straps with extra pillowcase bits, and trimmed it with simple white ribbon.

This picture is modeled by Coco the Bear, photographed by me.

Pockets!

Up next is a super-comfy robe, made from a vintage bed sheet using my Aikido gi top as a pattern. The basic shape is a wide T.

If you don’t have a gi that fits the way you want, get assistance in measuring your wingspan from thumb to thumb Divide that in half (Red). Then, measure down from the top of your shoulder across the widest part of your body to get the hem length you want (Green). It’s not as complicated as it sounds. I would suggest using an extra-baggy men’s t-shirt for the sleeves (Blue) and torso width (Aqua). Draw all of this out using taped-together sales papers or magazine ad pages to save paper. For the front, measure the width of your neck across your collar bones, mark a vertical line in the middle of your robe pattern, and draw a long, symmetrical V (Orange) from the top of the pattern that is as wide as your neck measurement.

Cut out the pattern and trace it onto fabric with whatever seam allowance is comfortable. Be sure to finish the seams, as these sheets fray. I rounded the corners as I sewed the bottom hem, and added slits to each side to suit my preferences. The belt is just a 4″ wide strip two and a half times my waist, folded into a tube and hemmed.

Detail shot showing slit and rounded corners.

To go with all this, I added pajama bloomers using Collette’s fabulous pattern.

I go to bed feeling pretty.

1 Comment

Filed under Crafting, Sewing

Baby Got Bustle: An easy, comfortable skirt modification and bustle alternative

For my Steampunk costume, one of the most important things I could work on was the bustle. I thought about doing a full hoop skirt and wire piece, but I wanted freedom of movement and those things aren’t remotely comfortable. I had a ruffly ivory sundress that was shirred at the bust, in a manner that made it really hard to wear. I pulled it down to my waist, and it became a calf-length skirt. This was a start.

Most skirts, however, are the same length all around. With padding under the back, the back hem would be awkwardly higher than the rest. Vertical gathering was an element in Edwardian fashion anyway, so using it to shorten the skirt made sense. I did two symmetrical gathers on the front, but you can do whatever you like.

To hand-stitch gathers the way I did, start with a thin needle and two seed beads, or as many as you want rows of gathers. Slide one seed bead onto one end of a length of strong thread the same color as your skirt and twice its length. Thread that onto the needle doubled over, and tie the ends together into a loop. Starting at the bottom so that the seed bead holds the thread in place, do a wide running stitch in a straight line up the skirt. Carefully pull the thread tight to form the gathers, and knot the thread at the top. Repeat this with all your other gathers, adjusting them as you go. Then, run a second running stitch along them all to lock the gathers in place.

I based my bustle pad on medieval bum rolls. The Edwardian silhouette focused on a large backside, so my version doesn’t extend to the hips. Basically, it sits on top of your natural posterior under your clothes, where a tramp stamp would be. I made my first one almost entirely out of cotton t-shirt scraps, which were both comfortable and easy to clean.

And now, let us do pattern math. Measure an inch or so below your natural waist, and divide that number in half. Then, get some help in measuring from below your natural waist to the widest part of your backside. Make a football-shaped pattern that’s as wide as your first measurement, and as long as your second. Tracing that onto another piece of paper, make a second football shape that’s a couple of inches wider, to taste. These will be the top and bottom layers of your bustle padding. Then, with your remaining material make a two-inch strip that’s about half again your waist measurement. Pin the two football pieces right sides together, and sew almost all the way around. Turn it right side out, and stuff with whatever filling you have. Finish sewing it up and attach the long strip. This can be tied around your waist, pinned to your undergarments, wrapped around the back of a garter belt, whatever.

Closeup of my pleats on the outside.

And now you have a simple, comfortable alternative to a crinoline. Get out there and show off your artificially-inflated booty.

Leave a comment

Filed under Crafting, Sewing, Steampunk

The infamous inner tube corset

When I dress up for Steampunk-acceptable outings, a lot of people notice my corset. Since corsets are one of the most recognizable elements of Steampunk attire, this is important. Mine is made from a broken bicycle inner tube, which are readily available and look great in projects like this.

This project will start with a little bit of math. Now, measure yourself around your ribs at the location of your bra band(or where one would go), at your natural waist, and at your hips. Decide on a few different corset lengths, because you may want to keep your options open for this project. Measure your bicycle inner tube or tubes, both lengthwise around the inside and around the width of the tube. Write all these measurements down and label them.

Divide the width of your hips or ribs, whichever is larger, by the width of the inner tube. The number you get will be the number of rubber strips you need. Add together the lengths of your tubes, and divide that by your ideal corset length. If this number is compatible with the number of strips you need, you can move on. If not, look at any shorter corset lengths you considered.

Divide your hip measurement by the width of your inner tube strips, then by 2. That’s the number of strips you’ll have on each side of the corset. If you want your corset in one piece, don’t divide by 2. Using this information, do a rough sketch of your corset paneling. Subtract your waist measurement from your hip measurement, and then divide by 2. This is the amount you need to reduce your corset by in the middle. Decide based on the length of your corset where the waist will be. Mark and label that line on your sketch. Before moving on to the next step, make sure you still have all of your figures recorded.

Over a sink, cut the tube open at the valve, so the tube is no longer in a ring. Then, in as straight a line as you can manage, cut down the length of your tube. As you do this, rinse out the gunk found inside the tube. Once your tube has been transformed into a strip of clean, shiny rubber, start marking it into sections in the length you decided on. It doesn’t have to be perfect, I kept mine quite rough at the edges, and it added to the effect.

Sew your pieces together. I sorted mine into two piles first, so that the sides came out looking vaguely symmetrical. Then, making sure your grommet locations match front and back on both pieces and that the grommets are closer than an inch to each other, hammer ’em in.  After sewing it into one or  two rectangles of panels and lacing the eyelets, try it on inside out. Keeping in mind the measurements  you found before, mark where to take it in and sew. Keep trying it on and adjusting it until it sits evenly on your body

Entirely handsewn. Owie.

.


Leave a comment

Filed under Crafting, Sewing, Steampunk