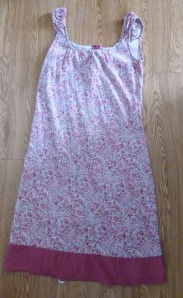
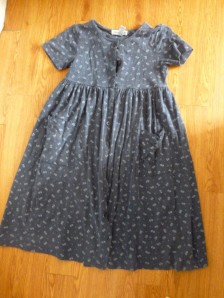
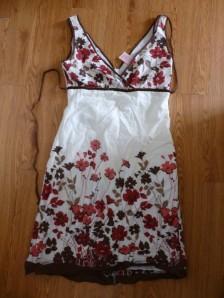
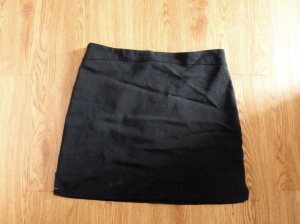
Made these things today. Click to enlarge.
One more thing
Filed under Uncategorized
DIY word shirt for dad
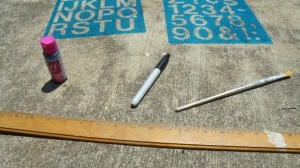
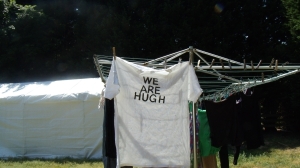
My parents used to print t-shirts. This led to a stash of white t-shirts in large sizes that none of them knew what to do with years later. After saving them from the dump, I stenciled a shirt for my dad. There are tons of ways to do this, but my (rather messy) way involves:
Scrapbooking stencils
A sharpie
Black fabric paint
A ruler
A small paintbrush
A graphic shirt to measure
A shirt to paint
And some cardboard or a file folder.
Lay your shirts flat, and measure the distance between the design and the collar. Also measure the distance between the armpits and the center line of the shirt. Use this measurements as reference for centering your design on the new shirt.
Stick some cardboard (or half a file folder) into your t-shirt underneath where the design will be. This will ensure your design doesn’t bleed through to the back of the shirt.
Trace your letters, one at a time, onto your shirt using the sharpie and stencil. Use the ruler to ensure your letters are level and spaced evenly.
Use the remaining cardboard or file folder as both a palette and a straight edge. Paint along your stencil tracing, covering the parts your don’t want to paint.
Continue patiently painting until your design is done. Let dry.
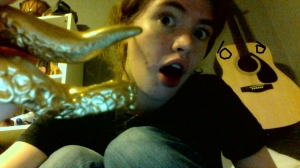
Tentacles? Tentacles.
So one of the great things about knowing how to make things is that you can make things you otherwise couldn’t afford. For example, animal-themed jewelry.
Fortunately, I have some gold paint and sculpey on hand for various creations.
For this project you will need:
Jump rings,
Some sculpey,
A straight pin,
And sharp knives.
First, pinch and roll the sculpey into a carrot shape.
Save your excess and roll it into a skinny sausage. Later, you’ll cut this into little discs for the suction cups.
Using your sharp knife, shave one side of the sculpey carrot.
Think of this as like peeling the skin off a carrot, if you enjoy thinking of craft dough as food. One side will now be flat, like this:
Curl and twist your tentacle into a cool shape. Really have fun with this one. Using photographs for reference will help.
Using your straight pin to pick them up, stick your little clay discs onto the the flat side of the tentacle in two rows. Use smaller discs near the tip of the tentacle, and larger ones near the base. This doesn’t need to be perfect, as long as it looks right to you.
If you want to attach your tentacle to a chain or finding later, add a jump ring by making a small slit in the base of the tentacle, partially inserting a jump ring, and pressing the hole closed gently. Adjust the shape of the tentacle and round out the suction cups as you like.
Now you can stick that sucker in the oven and bake according to the package’s instructions. Once it’s fully cooled, paint it if you like and enjoy.
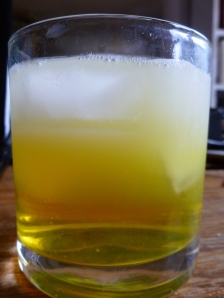
The (non-alcoholic) Pan Flute.
Not to be confused with the Pan-Galactic Gargle Blaster.
Step one: Put ice in a glass.
Step two: Add one whole Bacchus or other small, shot-form energy drink of choice. If you’re in Greensboro, these can be found at Super G.
Step three: Fill the glass the rest of the way up (Or as much as you like) with lemon juice. Observe that your drink is now striped*.
Step four: Add seltzer if you feel like it. This makes it a fit foamy.
Caffeinate responsibly. I wouldn’t recommend drinking more than one of these in a day.
* Also, it somewhat resembles pee. It’s a yellow-liquid thing.
Filed under Uncategorized
Stay or go? Part 2: Old-n-Busted vs. New Hotness
I like dresses. They’re fancy, quick to put on, and still allow for a nice breeze now and again. Unfortunately, they also get caught on things, stained, stepped on, or ripped. Pretty as they are, the dresses on this list have been heavily worn, and it shows. I’m sure I’ll accumulate many more, but for now I’ve pared it down to a choice few.
Going:
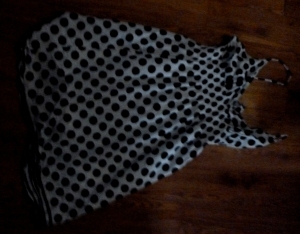
This one I’ve had for so long I broke the straps twice. This could be attributed to the flimsiness of noodle straps, but I like to think it’s due to my TOTALLY HARDCORE LIFESTYLE. Ahem.
This one has belonged to my sister or I for over six years. The knit fabric is thicker and sturdier than most. I thought briefly about keeping it and adding modifications, but the neckline is warped and the material has been bleached a little more than I would like.
This one, believe it or not, is fine. However, my rule for keeping clothes is that I have to be able to style it three ways I would actually wear, and a sheer purple tunic can’t deliver for me.
I am not fond of tunic tops. They possess the inconvenience of dresses, with the added benefit* of requiring pants. Eeevil.
I liked this one while it lasted. Its thin material showed off every jiggle and bump in bizarre ways, but it was thin and pleasant in the hot North Carolina summer. Now it’s threadbare, and feels revealing and childish at the same time. Ew.
I adore the cut on the strapless bodice here. I modeled the bodice on this dress after it. However, the skirt’s too high and cannot be walked in without its sky-high slit. I can appreciate turning heads now and again, but that’s just too much.
This dress has been a nineties nightmare. It’s stiff and shapeless, has a giant, zippered kangaroo pocket, and cannot be taken in without looking worse. Also, why on earth was I so obsessed with military olive?
I got this dress at 7, and was still wearing it at 15. Eek. I wore it so much I drew myself in it when I wanted a self portrait. Now that I’m three years older, I’ve decided I don’t want people thinking I’m an early-blooming elementary schoolkid. Who’d have thought?*
There’s not much to say about this one, really. It didn’t fit anyone in the house, and yet we clung to it in case we suddenly radically changed body type. Not worth it.
This one was alright in cut and color, but the material was strange in a bad way. I also had another I liked better.
Now let’s see the ones I’m keeping.
Staying:
Well-fitting, suitable to wear for most of the year, and it has pintucks and pockets. Win.
Why yes, this is a mumuu. It’s also buttery-soft, lightweight, and blousy but short at the same time. Excellent.
Do I even need to say it? I paid $2 for a close-fitting, 100% cotton, in-your-face eighties piece of magic. I rated the dresses above on a scale of one to this dress. Wonderful.
(*) Denotes sarcasm.
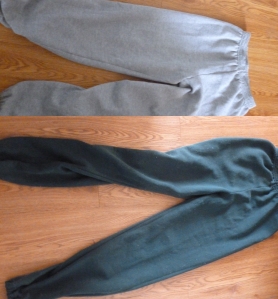
Coming up next: Things to replace those old sweatpants, followed by the big reveal of everything I’ve gotten rid of so far.
Stay or go? Short-neutral-toned skirt edition.
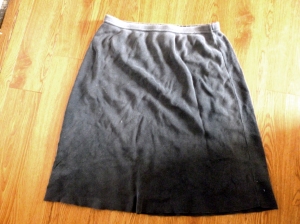
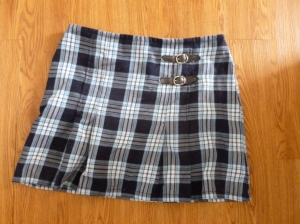
I have too many clothes. I’m not what I’d call a “shopaholic,” by any stretch of the imagination, but I don’t get rid of enough. Many of my clothes are from a time when I was insecure, and many others just don’t work for me even though they technically fit. My sister is reducing the size of her wardrobe, and I wanted to try a different approach. Behold my many short skirts:
This one is a hand-me-down from sometime in the nineties, like a lot of my clothes. It’s also unwearable. Note the semi-formal fabric and dress code-violating length.
This one is similarly problematic. I’m not sure I’ve ever worn it. It was originally handed over to my sister, who didn’t like or fit it.
This one, however, is too casual and it looks rather tired. Unlike the others, it was comfortable enough to be worn over and over again until it became a shadow of its former self.
This one is just unpleasant. It’s too short (And the constant creases make it shorter), too bulky and rather bleh.
This one is the last survivor from my middle school collection of teensy plaid skirts. It was a bit longer than the others, and so had an excuse to stay. It is, however, definitely the skirt of a 12-year-old girl.
All of these can be replaced easily by pants or the skirt I showed you last time. Fabulous.
Things I love (And a diy fishtail skirt)
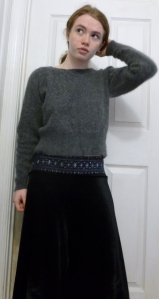
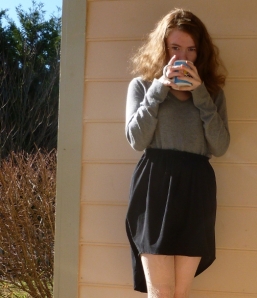
I have been trying to get rid of things I don’t really love. Goodwill will receive a mighty haul from me soon. To replace them, I’ve been making things I can style a number of different ways. For example, this gathered fishtail skirt inspired by A Pair & A Spare.
While I still love plaid, I no longer have reason to wear my collection of short plaid skirts that serve to make me look about 10. Instead I have this, which I would wear every day if I could. It’s a simple gathered skirt, with the elastic sewn directly onto the self fabric instead of into a casing and cut about six inches longer in back. I love my legs, but I don’t like showing off my unders. This skirt is a nice compromise.
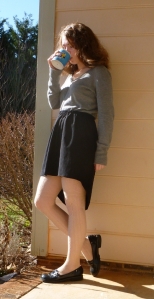
Tights and sweater: Target (On sale), Shoes: unknown, Skirt: DIY, Headband: Home Depot, Mug: New Garden Friends basement sale.
Lesson learned: Making things you really enjoy puts into perspective the things you don’t.
Also, I’ll get my 1,000th view today! Happy dance.
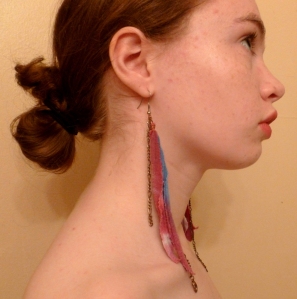
Fabric scrap earrings: For when feathers are too mainstream.
I made these using scraps from a ribbed, tie dye t-shirt, and a broken necklace. For earrings like these, get some ear wires, 18-gauge wire, any long, jagged fabric strips, and two pieces of chain. Stack the fabric scraps in a manner you like and poke your 18-gauge wire through the top of each strip. Make a short loop for hanging, and wrap the wire a few times around the fabric, tucking the loose end of the wire underneath. String the chain onto another piece of wire, and add your fabric tassel onto that. Stick the whole thing on the end of an ear wire, and repeat.
If liking it means you should put a ring on it…
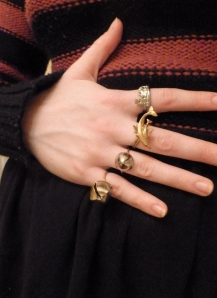
… I must really like my right hand. Heh.
I have been playing with wire and hot glue quite a bit lately, and thought the results were worth sharing.
I found a ring base design on one of many, many fashion blogs, and will link to it when I find it. It used a flat wire spiral and a loop of doubled-over wire. I will link to it when I find it. I would suggest using a marker or other round object the width of your finger for sizing.
For the bell ring:
- Get a bell ball. There should be plenty around at the end of December in craft shops. If necessary, rip one off a cheap drugstore toy your dog ripped apart.
- Before finishing the ring base, string the loop at the top of the bell onto the wire. Adjust the bell to the front of the ring.
- Close it up, and add a bead of hot glue to the bell loop where it meets the ring base.
For the spike ring:
- Make a loop at the end of some unbent wire. After bending the wire into a ring the right size for your finger, bend the loop outward. Wrap the remaining wire around the loop in a flat spiral.
- Get a two-pronged hollow cone stud ready.
- Cover the spiral part of the ring base in hot glue, and quickly stick it into the cone. Add more hot glue if necessary, and bend the prongs around the ring base.
For the dolphin ring:
- Get a charm from a store, or harvest one off a broken necklace. Remove any loops or jump rings.
- Using very thin wire, connect the ring to the base. Try to show as little wire on the outside as possible.
- Shock of shocks, the next step is to add hot glue.
For all rings, metallic paint is useful if your metals don’t match. It can also disguise visible glue. Let dry (I mean it) and spray with clear coat. I would avoid putting on your rings before the glue is cooled, regardless of how excited you are about them.
Enjoy!
